A squeaky metal bunk bed can disturb sleep, wake children, and make a sturdy frame feel unsafe. The noise may come from loose bolts, rubbing joints, worn washers, or uneven floor contact. Finding the exact source matters. Guessing can waste time.
This guide explains how to fix squeaky metal bunk beds with practical, careful steps. You will learn how to inspect the frame, tighten hardware, reduce metal-on-metal friction, and check the ladder and guardrails. A small wrench, screwdriver, rubber washers, felt pads, and suitable lubricant may solve the problem. Use only products recommended for metal hardware and indoor furniture.
Start by removing bedding and gently rocking the frame. Listen closely near each joint. A squeak from the ladder needs a different fix than one from the center rail. Tighten each connection gradually, rather than forcing one bolt. Excessive pressure can strip threads or bend thin metal.
Safety comes first.
After repairs, test the bunk bed with slow movements. Check that the frame remains level and that every guardrail feels firm. If you find cracked welds, badly bent tubing, missing fasteners, or repeated movement, stop using the bed. A replacement part or qualified furniture professional may be necessary.
Some squeaks return after a few nights. That is normal. Temperature changes, floor movement, and regular use can reopen small gaps. Keep a brief note of where the noise starts. This imperfect step can make the next inspection faster and more accurate.
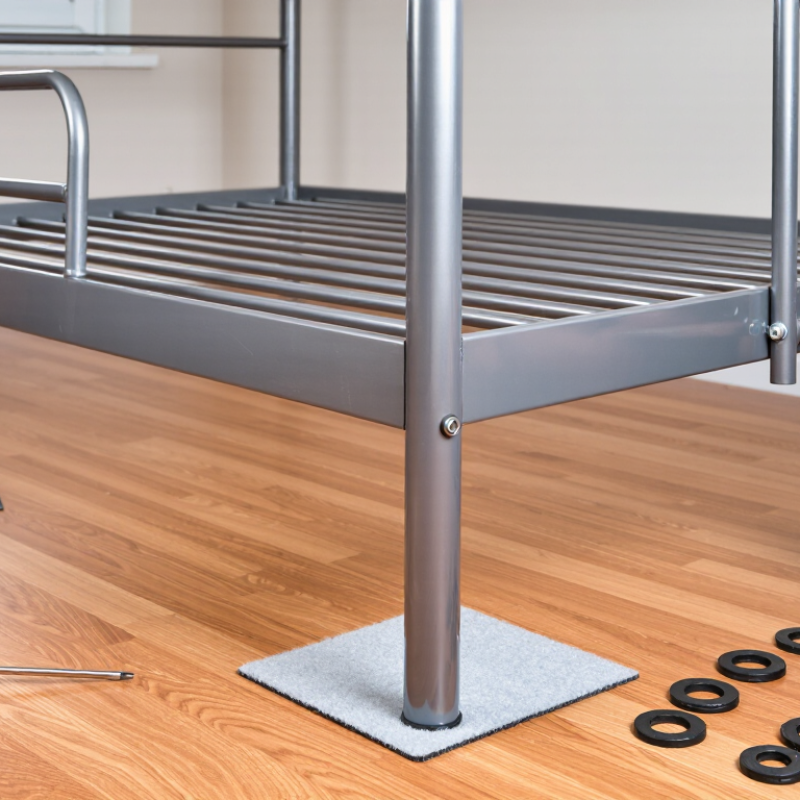
How to Fix Squeaky Metal Bunk Beds Fast?
Metal bunk beds rarely squeak from one source. Start with empty beds and remove bedding, toys, and loose items. Ask someone to gently shake the frame while you listen nearby. Check the ladder, guardrails, corner joints, and center supports. A short squeak often points to one moving joint. A deep creak may come from shifting slats.
Mark each noisy area with masking tape. Then test the parts separately. Hold a slat still while the frame moves. If the sound stops, add a thin rubber or felt pad between contact surfaces. For noisy joints, tighten the fasteners evenly with the correct tool. Do not overtighten them. Excess force can distort metal and create new movement. I have sometimes tightened every bolt and still heard noise. That mistake taught me to isolate the source first.
Tips: Check fasteners again after one night of use. Apply a small amount of silicone-based lubricant to a dry pivoting joint, but keep it away from sleeping surfaces. Replace damaged washers or missing hardware with matching parts. Do not use improvised screws. If you find a cracked weld, bent rail, or unstable guardrail, stop using the bunk immediately and arrange a qualified inspection. Safety outranks a quiet frame.
A squeaky metal bunk bed may need more than lubricant. Begin with a careful safety inspection. The U.S. Consumer Product Safety Commission’s NEISS data has linked bunk beds to roughly 36,000 emergency-department-treated injuries annually in recent reporting periods. Noise can signal loose bolts, worn welds, or shifting mattress supports. Do not ignore it.
Remove both mattresses and gently shake each rail, ladder, guardrail, and crossbar. Check for cracked welds, bent tubing, missing fasteners, sharp edges, and openings that could trap a child’s head or neck. ASTM F1427-21 emphasizes guardrail performance, structural strength, mattress support, entrapment protection, and clear instructions. Measure the mattress too. An oversized or poorly fitted mattress can reduce guardrail height.
Tighten fasteners with the specified tool, then add suitable locking washers only when the instructions permit them. Avoid drilling new holes or welding repairs without engineering review. Under 16 CFR Part 1213, bunk beds must meet federal safety requirements, including guardrail and entrapment provisions. The exact regulatory edition and incorporation status should be verified in the current Code of Federal Regulations. That detail matters.
After repair, apply moderate hand pressure to every joint and listen for movement. A silent frame can still be unsafe. I have seen owners test only the noisy corner, which is an incomplete check. Retire the bed if a structural weld is cracked, a rail remains loose, or replacement hardware cannot be identified. Keep the assembly instructions and record the inspection date.
The chart shows two dimensional safety screening values used for bunk-bed evaluation: the upper guardrail must extend at least 5 inches above the top surface of the mattress, while applicable upper-bunk end-structure openings are screened against a 9-inch diameter passage limit. Before tightening a squeaky frame, remove the bed from service and inspect loose fasteners, missing hardware, cracked welds, bent rails, and damaged guardrails. Retighten or replace only with suitable hardware, then verify the assembled bed against the current ASTM F1427 requirements and U.S. 16 CFR Part 1213.
Values shown in inches. Sources: ASTM F1427-21, Standard Consumer Safety Specification for Bunk Beds; U.S. 16 CFR Part 1213, Safety Standard for Bunk Beds. Always use the current official text and applicable test procedures.
Before chasing the squeak, verify the upper guardrail height. With the mattress installed, measure from its highest sleeping surface to the top of the rail. Keep the rail at least 5 inches (12.7 cm) above the mattress. Do not trust the listed mattress thickness alone. Foam can compress, while thick bedding can reduce the real clearance. Check every rail position, including the ladder side. If the measurement falls short, remove excess padding and follow the bed’s assembly instructions. Local safety requirements may demand more than 5 inches.
A loose joint often causes the sharp metallic sound. Ask someone to gently shift the bed while you listen near each bolt and corner. Tighten loose fasteners gradually, using the correct tool. Over-tightening can distort metal and create new stress points. Add suitable washers when the design allows them, but never drill new holes or alter a guardrail. Inspect cracked welds, bent rails, missing caps, and stripped threads. Stop using the bunk if any structural part moves independently.
After tightening, place the bed on a level floor and test it again. A thin, manufacturer-approved spacer may reduce rubbing between connected metal surfaces. Avoid oily sprays near sleeping areas; they can collect dust and stain fabric. I have found that the “squeak” is sometimes a shifting floor, not the frame. Recheck the guardrail after moving the bed, changing the mattress, or tightening hardware. Small oversights matter here.
A squeaky metal bunk bed often has a simple cause: two steel parts rubbing under load. Check the joints while the bed is empty. Look for shiny rub marks, worn paint, loose washers, or shifted brackets. These details reveal where movement occurs. I once tightened a noisy frame without checking alignment. The squeak returned the next night.
Loosen the affected bolts slightly, then realign the rails, legs, and support brackets. Keep every part flush and square before tightening. Small misalignment can create strong side pressure. Use the assembly manual to find the specified torque for each fastener. Do not guess. Tighten bolts gradually in an alternating pattern, using a calibrated torque wrench when possible. Stop and inspect. The joint should feel firm, with no rocking or visible gaps. If metal still touches during movement, install only a suitable barrier approved for that assembly, such as a proper spacer or washer. Avoid adding random rubber pieces, tape, or extra hardware. They may change the joint’s strength or hide a developing crack. Test the bed gently after repair, then recheck every connection after several nights. Some squeaks come from damaged threads, bent rails, or stretched fasteners. Those parts need replacement, not more torque. If the manufacturer’s torque data is unavailable, contact a qualified repair professional before loading the bed.
| Step | Inspection or Repair Area | Typical Finding | Recommended Action | Useful Measurement or Setting | Verification |
|---|---|---|---|---|---|
| 1 | Locate the squeak | Noise occurs when the frame shifts, the ladder is used, or the sleeper turns. | Apply controlled pressure to the guardrail, ladder, side rails, and support slats while listening for metal-on-metal movement. | Check every joint individually; do not tighten all fasteners at once before identifying the source. | The squeak becomes repeatable at one or more specific joints. |
| 2 | Inspect bolts, nuts, and washers | Loose hardware allows brackets and tubes to rub during normal movement. | Look for missing washers, damaged threads, elongated holes, cracked welds, or polished rubbing marks. | Replace damaged fasteners with the same diameter, thread type, length, and strength class. | No missing hardware, visible cracks, or abnormal hole movement is present. |
| 3 | Clean contact surfaces | Paint flakes, rust, dirt, or metal burrs prevent parts from seating evenly. | Remove loose debris with a nylon brush; lightly smooth sharp burrs without reducing the structural thickness. | Keep load-bearing holes round and free of excessive material removal. | Mating surfaces sit flush and no loose rust or paint remains between them. |
| 4 | Align the frame | Misaligned rails or posts place side loads on bolts and create rubbing points. | Loosen the affected joint slightly, align the posts and rails by hand, then install all hardware before final tightening. | Check that posts are vertical and rails are parallel; avoid forcing parts into alignment with a hammer. | The frame remains square and stable when lightly pushed from opposite sides. |
| 5 | Torque common metric bolts | Under-tightening permits movement; over-tightening can strip threads or deform tubing. | Use a calibrated torque wrench and tighten gradually in an alternating pattern. | Typical dry steel starting ranges: M6: 8–10 N·m; M8: 18–25 N·m; M10: 35–45 N·m. Use the original specification whenever available. | Fasteners reach the specified torque without thread slip, tube collapse, or bracket distortion. |
| 6 | Reduce direct metal contact | A tight joint still squeaks because two steel surfaces slide against each other. | Install a thin non-structural nylon, rubber, or felt isolator only where the design permits and where it will not affect seating. | Use a thin, firmly retained pad; never place soft material between a load-bearing bolt head and its seating surface unless specified. | The isolator cannot shift, bunch up, or interfere with bolt engagement. |
| 7 | Lubricate suitable threaded parts | Dry threads or thread corrosion cause inconsistent tightening and may produce creaking. | Apply a small amount of suitable anti-seize or thread lubricant to compatible threads only if permitted by the assembly instructions. | Lubricated threads can produce more clamp force at the same torque; reduce torque only when the specification provides a lubricated value. | No lubricant reaches mattresses, sleeping surfaces, friction-lock components, or painted contact areas. |
| 8 | Check slats and support ledges | A loose metal slat or support tab vibrates against the frame. | Re-seat each slat, tighten its retaining hardware, and replace bent or cracked supports. | Maintain even slat spacing and full contact with both side rails. | No slat lifts, rattles, or shifts when pressed by hand. |
| 9 | Inspect ladder and guardrail joints | High-use joints loosen faster and may rub at the mounting plates. | Align the ladder and guardrail plates, install all washers, and torque the fasteners evenly. | Confirm that guardrails are secure and that openings meet the original design requirements. | No lateral play remains when the ladder or guardrail is pulled firmly. |
| 10 | Perform a final safety test | A quiet frame may still have a structural defect or loose connection. | Recheck every fastener, apply a gradual load, and listen for movement from all sides. | Stop use if there is a cracked weld, bent post, stripped thread, severe corrosion, or persistent instability. | The bed is stable, aligned, free of abnormal noise, and all safety components remain secure. |
Metal bunk bed squeaks usually come from small movements where rails, bolts, and brackets meet. I start by removing bedding and checking each connection by hand. A flashlight helps reveal chipped paint, bent tabs, or widening gaps. Tighten loose fasteners evenly, but do not force them. Over-tightening can distort thin metal.
Apply a small amount of PTFE or silicone lubricant to clean contact points. Focus on bolt sleeves, rail hooks, and bracket edges. Use the applicator tube for better control. Keep lubricant away from ladder steps, floor contacts, and mattress supports. Slippery surfaces may create hazards. Wipe away drips with a dry cloth. Then gently rock the empty frame and listen again. Quiet now? Good, but not proof.
Sleepers, movement, and temperature changes can bring the noise back. Mark each checked joint with a small pencil dot. Inspect every connection again after 30 days. Look for fresh metal dust, new gaps, or a returning squeak. If the bed shifts, a weld is cracked, or a rail sits loosely, stop using it. Seek qualified repair guidance. I have found that lubricant can mask a loose joint temporarily. That is where I was wrong. A quiet frame still needs a careful structural check.
Keep the rail at least 5 inches (12.7 cm) above the mattress surface. Measure the installed bed, not the label.
Foam may compress, while thick bedding raises the sleeping surface. Check every rail position, including the ladder side.
Empty the bed first. Look for shiny rub marks, worn paint, loose washers, shifted brackets, and visible gaps.
Ask someone to shift the bed gently. Listen near each bolt, corner, rail, and support bracket.
Use the correct tool and tighten gradually. Follow the assembly instructions instead of guessing.
Yes. Excessive force can distort metal and create new stress points. A firm joint should not rock or show gaps.
Loosen the bolts slightly, align the parts, and keep them flush and square. Tighten them in an alternating pattern.
No. Use only a suitable spacer or washer approved for that assembly. Improvised pieces may weaken the joint.
Stop immediately if a rail moves independently, welds are cracked, threads are stripped, or metal parts are bent.
The floor may be shifting, or a fastener may be stretched. I once blamed the frame too quickly. Recheck everything after several nights.
Learning how to fix squeaky metal bunk beds starts with finding the exact source of the noise. Test the bed carefully and isolate each joint, slat, bracket, and fastener before making repairs. Confirm that the frame is stable, undamaged, and assembled according to its instructions. As an added safety check, review the frame against ASTM F1427-21 and U.S. 16 CFR Part 1213 requirements, paying special attention to guardrails. The guardrail should extend at least 5 inches (12.7 cm) above the top of the mattress to help reduce fall risks.
Most squeaks come from loose hardware or metal parts rubbing together. Realign the affected components, tighten or torque bolts to the original equipment manufacturer’s specifications, and replace damaged fasteners when necessary. For persistent metal-on-metal friction, apply a suitable PTFE or silicone lubricant sparingly at the contact points. Afterward, test every joint, listen for remaining movement, and inspect the bed again after 30 days to confirm that the repair remains secure and quiet.

Rimkok Furniture