Keeping upholstered auditorium chairs clean protects their appearance, comfort, and long-term value. These seats collect dust, skin oils, spilled drinks, and crumbs between performances. In busy venues, stains may sit unnoticed beneath dim lighting. A practical cleaning routine helps staff respond before fabric damage becomes permanent.
This guide explains how to clean upholstered auditorium chairs effectively, using methods suitable for fabric-covered public seating. Begin by checking the manufacturer’s care label and identifying the upholstery material. Polyester, wool blends, velvet, and treated fabrics may require different products. Always test a small hidden area first. A pale cloth and gentle detergent can prevent a serious color mistake.
Vacuum slowly around seams, hinges, and seat gaps. Use a soft brush attachment to avoid pulling delicate fibers. Blot fresh spills with a clean white towel. Do not scrub aggressively. Scrubbing can spread the stain and flatten the fabric’s texture. Use limited moisture, because soaked padding dries slowly and may develop unpleasant odors. That detail is often overlooked.
For older stains, trained cleaning staff should follow the upholstery manufacturer’s instructions. Commercial extraction may be appropriate, but excessive water pressure can damage foam or wooden components. Record the product used, the cleaning date, and any visible changes. This creates a dependable maintenance history for facility managers.
Even careful cleaning is not perfect. Some marks need professional treatment or fabric replacement. Regular inspections, prompt spill response, and scheduled deep cleaning usually produce better results than occasional emergency work. With consistent care, auditorium chairs can remain hygienic, inviting, and ready for the next audience.
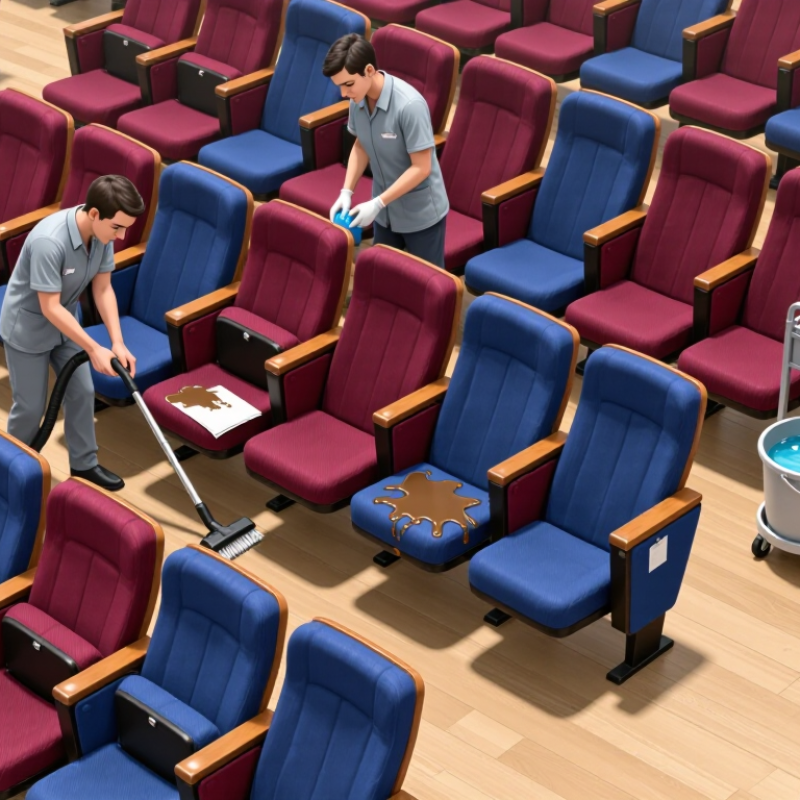
Upholstered auditorium chairs need material-specific cleaning, not one universal spray. The U.S. Environmental Protection Agency reports that indoor pollutant levels may reach two to five times outdoor levels. Fabric seats can trap dust, skin oils, and spilled drinks between performances. Begin with a low-suction vacuum and a soft upholstery tool. Test hidden fabric first. Water-sensitive textiles may develop rings, shrinkage, or stiff patches.
Polyester blends usually tolerate controlled extraction, while wool, velvet, and treated acoustic fabrics require gentler methods. Vinyl and polyurethane coverings resist liquid better, but seams still hold moisture. The International Textile Manufacturers Federation’s 2023 material report shows polyester remains the dominant synthetic fiber globally, yet fiber content alone does not confirm stain resistance. Check the manufacturer’s cleaning code, backing, and flame-retardant treatment. This step is often skipped. That is a mistake.
Tips: Vacuum from seams outward, then blot spills with white microfiber cloths. Avoid aggressive brushing. Use measured detergent, not extra detergent. Excess residue attracts soil. The Centers for Disease Control and Prevention recommends cleaning visibly dirty surfaces before disinfection; however, routine auditorium upholstery rarely needs harsh disinfectants. Ventilate after damp cleaning, and keep seats unused until fully dry. Record fabric type, product dilution, drying time, and recurring stains. A simple log improves consistency, though staff may still overlook hidden armrest edges. Recheck those areas under bright side lighting.
Removing dust, debris, and surface soil starts with a careful visual inspection. Check seams, folds, seat edges, and the gaps beneath armrests. Loose dirt often hides there.
Use a vacuum with a soft upholstery attachment, keeping the nozzle close without pressing hard. Excessive pressure can push grit deeper into the fabric. Work from the backrest downward, then clean the seat and lower frame. Short, overlapping passes usually lift more dust than quick sweeping motions.
A narrow attachment helps collect popcorn crumbs, paper pieces, and trapped hair around hinges.
For surface soil, prepare a small amount of mild detergent in cool water. Test it on a hidden area first, since some fabrics may change color or texture. Dampen a clean cloth rather than soaking the chair.
Blot the marked area gently, moving from the outside toward the center. Do not scrub aggressively. Scrubbing can spread soil and roughen delicate fibers. Use a second cloth with clean water to remove residue, then leave the chair uncovered until fully dry. Good airflow helps.
Inspect the cloth afterward. I sometimes find that a second light pass works better than one forceful cleaning. That is easy to overlook.
Avoid harsh chemicals, stiff brushes, and excessive moisture. They may damage padding beneath the upholstery. Regular cleaning records also help staff notice recurring debris near entrances or high-use rows.
Treating stains on upholstered auditorium chairs requires patience and the correct cleaning solution. Identify the fabric before applying moisture. Manufacturer care labels often reveal whether water-based or solvent-based cleaning is suitable. If the label is missing, test a hidden area first.
Wait until the fabric dries completely. A small color change can become obvious under bright auditorium lighting.
For fresh coffee, juice, or food stains, gently lift solid residue with a dull spoon. Blot the liquid with a clean white cloth. Do not scrub. Rubbing can push the stain deeper and damage the fibers.
Mix a small amount of mild, pH-neutral detergent with lukewarm water. Apply the foam, not excessive liquid, to the stained area. Work from the outside toward the center. This helps prevent a dark ring.
Greasy marks may need a fabric-safe solvent, but ventilation is essential. Never combine cleaning chemicals. Strong disinfectants can fade upholstery or leave irritating residues.
After treatment, blot with clean water if the fabric allows it. Then dry the chair with airflow before returning it to use. I have seen careful cleaning leave a faint outline when too much solution was applied.
That mistake is easy to repeat. Smaller applications work better. Document the solution, dilution, and drying time for future maintenance.
Inspect seams and edges, where residue often remains hidden.
Deep-cleaning upholstered auditorium chairs requires control, not excessive water. Dust settles in seams, armrests, and beneath folding seats. EPA’s Indoor Air Quality report states that indoor pollutant levels can be two to five times higher than outdoors, and sometimes much higher. Fabric seating can hold skin oils, food residue, and fine particles. A thorough cleaning plan should match the fabric code, soil type, and ventilation conditions.
Begin with a HEPA-filtered vacuum, using a soft brush around stitching and seat hinges. Treat stains with a measured solution after testing a hidden area. Use low-moisture extraction when possible. Overwetting may cause slow drying, odor, or discoloration. CDC guidance recommends cleaning visibly dirty surfaces before applying disinfectants; however, many disinfectants are unsuitable for porous upholstery. Always follow the chair manufacturer’s care instructions and the chemical label. I have seen rushed cleaning leave damp seat edges for hours. That mistake is easy to repeat.
Tips: Work in small sections. Keep fabric evenly damp, never saturated. Use fans to improve airflow, and check moisture before reopening the auditorium. Record stains that remain after treatment; some marks need professional restoration rather than stronger chemicals. EPA also links poor ventilation with indoor air concerns, so inspect air movement during drying. A clean chair should feel dry, smell neutral, and show no tide lines.
Deep-cleaning upholstered auditorium chairs typically combines vacuuming, spot treatment, low-moisture cleaning, and hot-water extraction. The chart compares practical estimated labor time for one chair.
Typical time estimates per chair vary according to fabric condition, soil level, equipment, and drying requirements.
Clean upholstery begins with controlled moisture, not aggressive scrubbing.
Vacuum each auditorium chair slowly, including seams, hinges, and the gap beneath the seat. Test a small hidden area before applying any cleaning solution. A pale cloth should remain free of transferred dye.
Use a slightly damp cloth for ordinary marks. Blot from the outside toward the center. Rubbing can spread soil and flatten the fabric pile.
After cleaning, leave seats fully open, if possible, and improve air movement with fans. Do not stack damp cushions or close folding seats too soon. Moisture trapped inside padding may create odors and weaken materials. Dryness matters.
I once underestimated how long a shaded row needed to dry. The surface felt dry, but the inner padding remained cool and damp. Now I check several areas by touch and use a moisture meter when available. Inspect stitching, fasteners, armrests, and seat edges during this process. Look for loose threads, frayed fabric, stains returning from beneath the surface, or uneven color.
Record damaged chairs by row and seat number. Small repairs are easier before daily use enlarges the problem.
Schedule gentle vacuuming weekly, with deeper cleaning based on traffic and fabric condition. Keep food and drink checks practical, not excessive.
Staff should report spills immediately, though rushed reports sometimes miss sticky residue under the seat. A second inspection catches it.
Keep cleaning records with dates, observed damage, drying time, and the person responsible.
Begin with a visual inspection. Check seams, folds, seat edges, armrest gaps, and areas beneath folding seats.
Use a vacuum with a soft upholstery attachment. Make short, overlapping passes from the backrest downward.
Strong pressure can push grit deeper into the fabric. A narrow attachment helps collect crumbs, paper pieces, and trapped hair.
Mix a small amount of mild detergent with cool water. Dampen a cloth, then blot gently from the outside inward.
Use another cloth with clean water if the fabric allows it. Leave the chair uncovered until completely dry.
Lift solid residue with a dull spoon. Blot liquid with a clean white cloth, then apply a small amount of foam.
Some fabrics may change color or texture. Test a hidden area and wait until it dries completely.
Usually not. Scrubbing can spread soil, roughen fibers, and push stains deeper. Smaller applications are safer.
Work in small sections and keep fabric evenly damp, never saturated. Fans can improve airflow and shorten drying time.
Only when it feels dry, smells neutral, and shows no damp edges or tide lines. I sometimes reopen spaces too early; that deserves review.
Learning how to clean upholstered auditorium chairs effectively begins with identifying the upholstery material and checking its care requirements. Different fabrics may respond differently to moisture, detergents, and agitation, so always test a small hidden area first. Start by vacuuming the seats, backs, seams, and gaps to remove dust, crumbs, and loose soil. For stains, use a mild cleaning solution suited to the fabric, applying it sparingly and blotting rather than rubbing. Work from the outer edge of a stain toward the center to help prevent spreading and avoid oversaturating the padding.
For deeper cleaning, use an appropriate upholstery-cleaning method while following safe moisture limits. Clean in manageable sections, paying attention to high-contact areas such as armrests and seat edges. Afterward, remove excess moisture, improve airflow, and allow the chairs to dry completely before use. Inspect the upholstery for remaining marks, uneven appearance, or odor, then repeat gentle treatment if necessary. Regular vacuuming, prompt stain removal, and scheduled deep cleaning will help preserve cleanliness, comfort, and the appearance of auditorium seating.

Rimkok Furniture